We installed 4 brand new windows into our 2005 Sprinter Van. We ordered AMA style windows with 17% tint. They sit flush against the van. The rear windows are solid and the side windows are slider windows that open halfway sideways. You can purchase them on Amazon or order them through VanWindowsDirect. Below is the 10 step process to install the windows into your van. 
>>If you prefer a VIDEO tutorial, click here to watch the video of how to install windows<<
Materials needed: a jigsaw, a file, painter’s tape, alcohol cleaner, rustoleum rust preventative enamel, rubber edging, primer, Sikaflex adhesive, and of course the windows themselves. (We purchased our primer and rubber edging through VanWindowsDirect along with the windows)
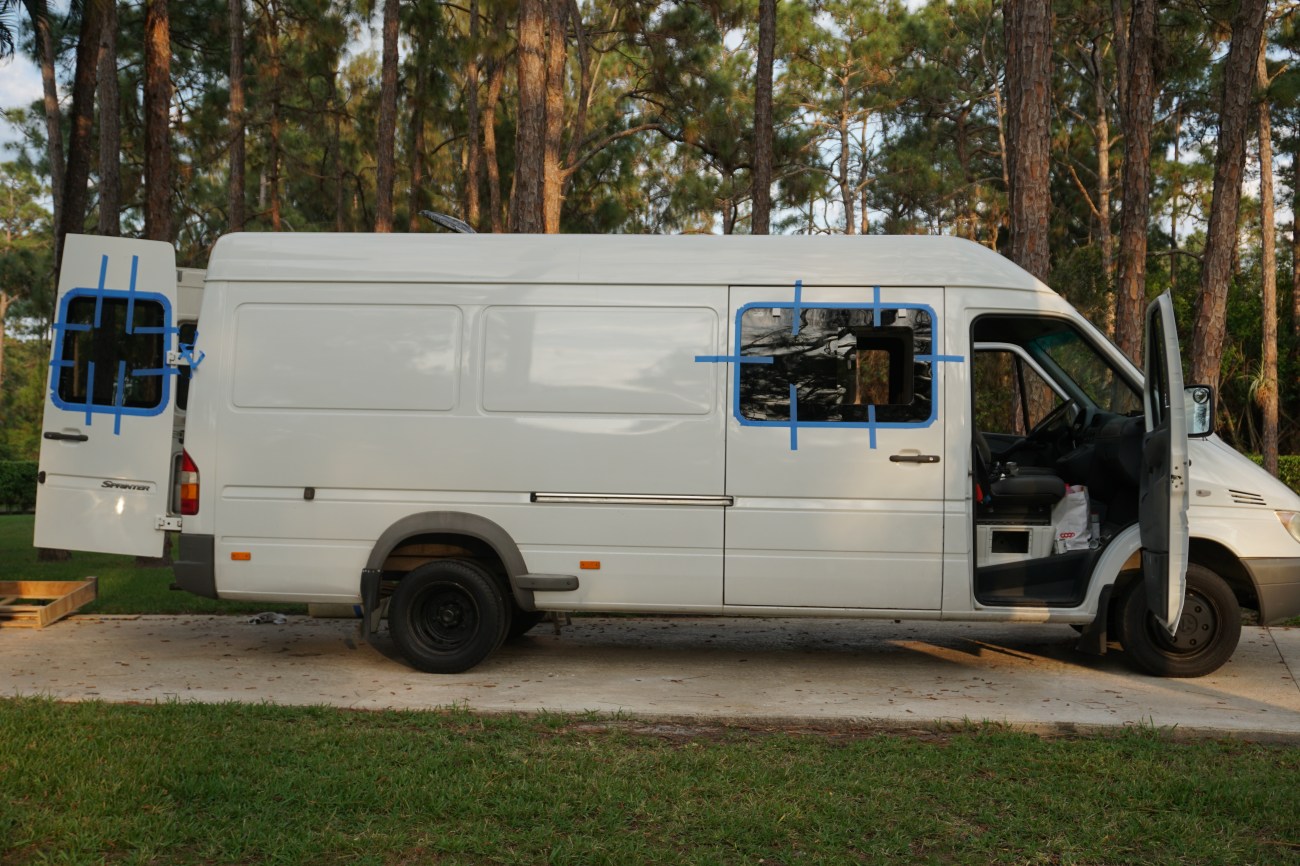
STEP 1: APPLY PAINTERS TAPE AROUND THE FRAME WHERE YOU WILL CUT
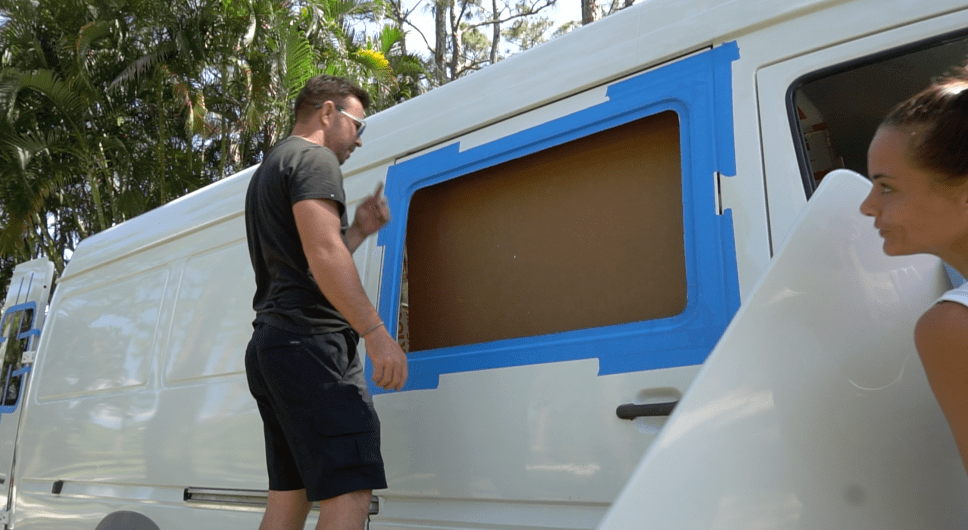
- On the exterior of the vehicle place tape all the way around the edges that you will be cutting. This is an important step for 2 reasons. 1- It protects the paint on your vehicle from being scratched by the jigsaw. and 2- It will help serve as a guide for where you are cutting out the metal. Details of what to cut out/what to leave on are written in next step. In the photo below, anything blue is being LEFT ON.

STEP 2: USE JIGSAW TO CUT OUT METAL
- The nice thing about Sprinter vans is that they basically come with a template of where to cut out metal to install windows. On the exterior, there is an indented flat “frame” that is further in than the part you will be cutting out. You want to make sure you LEAVE that indented flat surface on the vehicle, as this part will be where you place your adhesive and attach the window onto. You will want to cut out the metal rectangle that protrudes out slightly further than than frame. Cut as close to the edge of that rectangle as possible to leave as much of the flat frame as you can. Cutting a big hole in your vehicle can be scary, but because of this “built in template” on Sprinters, it is actually really hard to mess it up. The video tutorial I made of this is especially helpful to see a visual of this step.

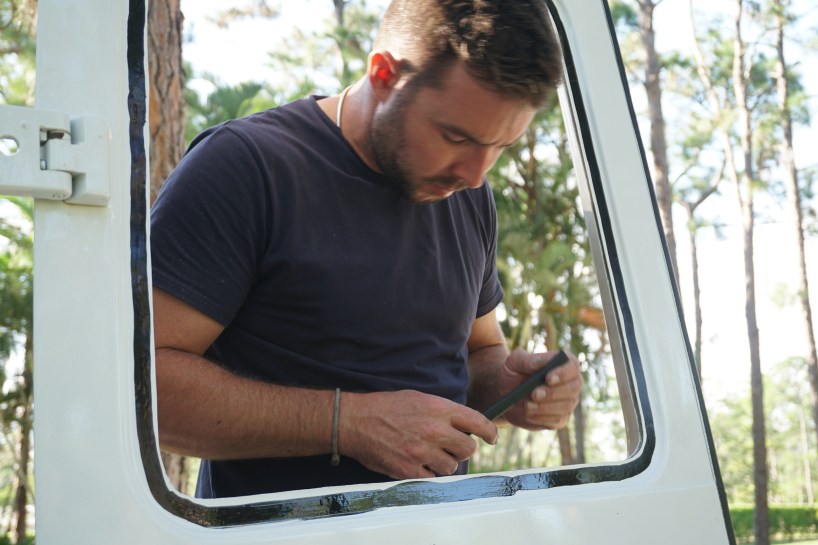
Dave’s finger is touching the indented flat surface that you want to leave on the vehicle. You only want to cut out the protruding area that sits inside of that flat frame.
Once you have placed your tape, you may want to then drill a pilot hole (using a drill) to allow your jigsaw blade to easily go through the metal to start cutting out the frame. Then put your blade through the hole and begin cutting along the edge of your tape line until it is cut out. Pictured below is right after we cut out the passenger side. (placed cardboard inside to prevent tiny metal filings from getting all over interior van).
Right after using jigsaw to cut out passenger side metal
STEP 3: FILE DOWN EDGES OF WINDOW FRAME
- This step is pretty self explanatory. Using an ordinary metal file, file down the edges that you cut in the previous step to remove any jagged edges.
STEP 4: CLEAN FRAME WITH ALCOHOL
- Important to wipe the frame clean of any dirt or metal shavings with alcohol to ensure the best possible seal between the van and the window.
STEP 5: APPLY A RUST PREVENTATIVE ON FRESHLY CUT METAL IN FRAME
- Any freshly cut metal that is exposed to the air is prone to rust. To prevent rust from happening, lace a small amount of a rust preventative, such as rustoleum rust preventative enamel, on a paint brush and dab it all the way around the newly cut frame. Then wait for it to dry before proceeding to the next step.

STEP 6: PUT ON PRIMER AROUND EXTERIOR WINDOW FRAME
- On the exterior of the frame (on the flat surface that you will be sticking the window onto), apply a thin even coat of primer all the way around the frame. This helps the adhesive to bond to the vehicle more effectively. In the photo below, the black on the frame is the primer on our rear window install.
STEP 7: PLACE RUBBER EDGING INTO THE FRAME
- Place rubber edging along the shape of the frame. It should hug the frame on both the interior and exterior sides of the frame rather tightly. Cut the edging with a knife if there is extra.

Rubber framing on side window

Rubber framing on rear window
STEP 8: APPLY SIKAFLEX SEALANT ADHESIVE AROUND EXTERIOR FRAME
- Apply a generous layer of Sikaflex Adhesive around the exterior of the frame. Make sure you put on enough to ensure a tight seal between window and van… it is very strong stuff and will work, but you don’t want your windows falling off. However, it is tedious to clean off the paint of your vehicle if you put to much on and it protrudes out the sides when you push on the window.
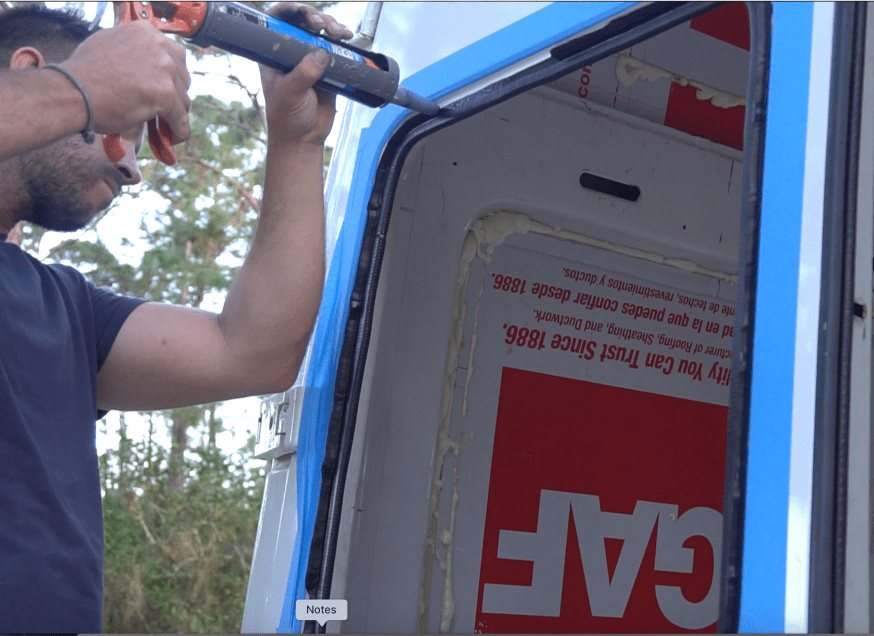
applying Sikaflex adhesive to the rear window
STEP 9: SLOWLY PLACE AND PUSH THE WINDOW INTO ADHESIVE
- Simply pick up the window glass and position it on top of the adhesive sealant in the position you want it. Push lightly on all sides to ensure it sticks into the sealant as best as possible. You can move it around slightly for a minute or 2 to get it exactly where you want it to sit.
STEP 10: SECURE WINDOW IN PLACE WITH TAPE FOR 24 HOURS
- Lastly, place a few pieces of tape on all sides to provide extra security in keeping the windows in their place. See photos below for how. You can remove the tape after 24 hours (but can drive the car after only 3 hours and wash the car after 3 days).

ENJOY YOUR NEW NATURAL LIGHT AND NEW VIEWS!
If you have any questions, email me at KellyNicoleTravel@gmail.com or send me DM on Instagram @KellyNicoleTravel.
– Kelly and Dave
Back to: Complete Guide to Self-Convert a Van into A Home
Related Pages: Treating Rust, Insulating a Van, Setting up Van Power Supply, Setting up Van Water Supply, Building Van Layout, Choosing Appliances for Van, Flooring/Cieling/Walls
